Traefik Enterprise Edition on Rancher 2
Warning
This guide is only for TraefikEE < v1.2.2
Follow the Kubernetes guide when using TraefikEE >=v1.2.2.
Traefik Enteprise Edition (TraefikEE) is a production-grade, distributed, and highly-available routing solution built on top of Traefik.
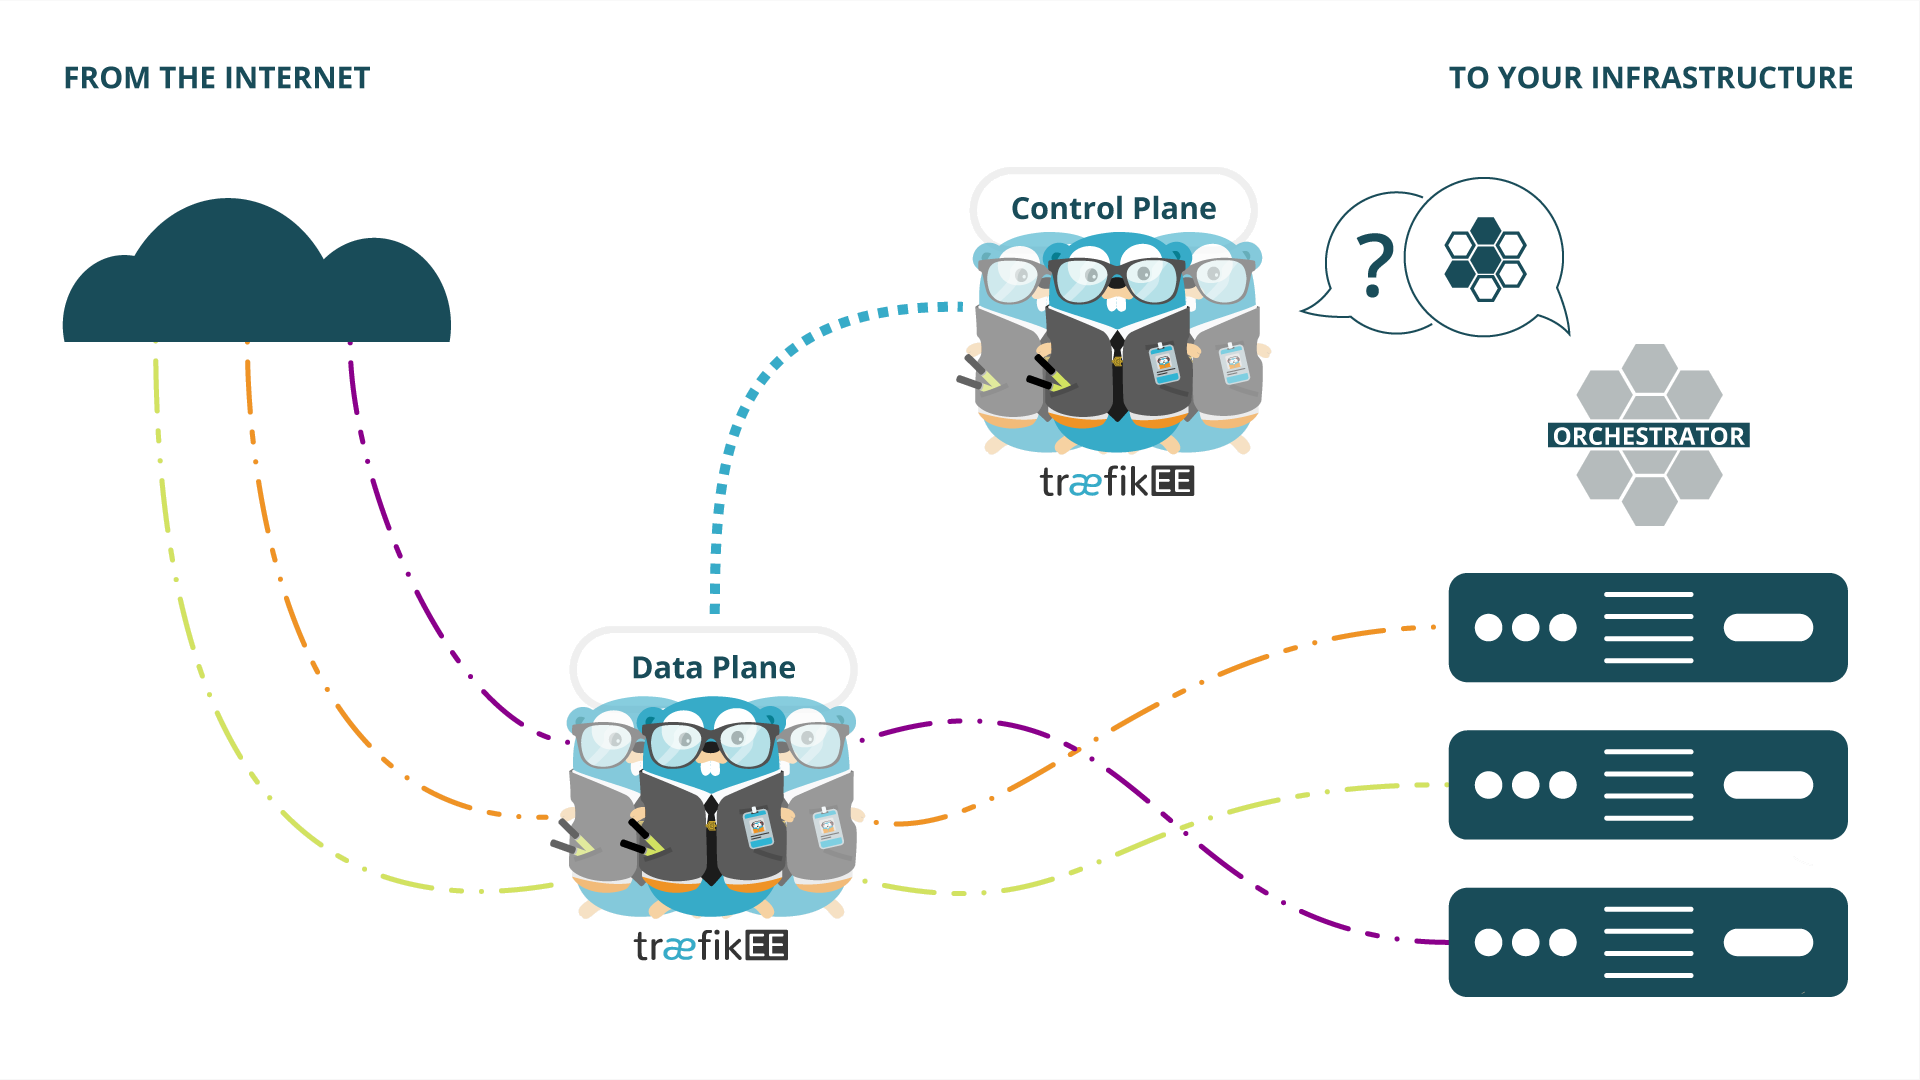
If you want to learn more about TraefikEE, please refer to the page "Concepts" of the documentation.
Prerequisites
This solution guide was tested with the following elements:
- Rancher version: 2.2.8
- TraefikEE < v1.2.2
- A valid TraefikEE license stored in the environment variable
$TRAEFIKEE_LICENSE_KEY - TraefikEE on Kubernetes requirements
Select a Kubernetes Access Topology
Rancher 2 allows for the creation and management of one or more Kubernetes clusters from multiple providers through a single platform.
Direct vs Indirect Access to the Kubernetes Cluster
For each cluster managed by Rancher 2, a kubeconfig file is generated containing the required information to access the cluster with kubectl.
This kubeconfig file is set by default to connect to the Kubernetes Cluster using the Rancher 2 platform as a proxy. This connection method is currently not supported by traefikeectl. A workaround is to use an extra context generated by Rancher 2 providing a Direct Access to the Kubernetes Cluster API.
Select the installation method based on the topology of the Kubernetes cluster:
-
Browse to the administration UI of Rancher 2: if the provider of the cluster is
Imported, then proceeed with the instructions of the section Imported Kubernetes Cluster. -
If the provider is NOT
Imported, verify that the option Authorized Cluster Endpoint is available and enabled on the cluster. Note that not all cluster types can be configured that way. See the page "Cluster Options" to enable it through Rancher 2.- If the option is enabled, proceed with Installation with Direct Access.
- If the option is not available or cannot be enabled, proceed with Installation without Direct Access.
Installation with Direct Access
Download the cluster kubeconfig file from Rancher 2, set the KUBECONFIG environment variable to its downloaded location (also required by traefikeectl) and retrieve the endpoint of the context in use.
The output of the following command should not end with /k8s/clusters/c- pattern. If it does, check the Additional steps instructions below.
export KUBECONFIG=/my/example/location/kubeconfig
kubectl config view -o jsonpath="{.clusters[?(.name == \"$(kubectl config current-context)\" )].cluster.server}"
Additional steps if the endpoint contains /k8s/clusters/c- pattern.
Display the contexts available.
# Command
kubectl config get-contexts
CURRENT   NAME                                    CLUSTER                                 AUTHINFO     NAMESPACE
*         traefikee                               traefikee                               user-4lfdv
        traefikee-rancher2-rancheragent-0-all   traefikee-rancher2-rancheragent-0-all   user-4lfdv
Switch the Current context to traefikee-rancher2-rancheragent-0-all which is the Extra context here.
# Command
kubectl config use-context traefikee-rancher2-rancheragent-0-all

# Output
Switched to context "traefikee-rancher2-rancheragent-0-all".
Validate the context switch.
# Command
kubectl config get-contexts

# Output
CURRENT   NAME                                    CLUSTER                                 AUTHINFO     NAMESPACE
        traefikee                               traefikee                               user-4lfdv
*         traefikee-rancher2-rancheragent-0-all   traefikee-rancher2-rancheragent-0-all   user-4lfdv

# Command
kubectl config view -o jsonpath="{.clusters[?(.name == \"$(kubectl config current-context)\" )].cluster.server}"

# Output
https://127.0.0.2:6443
Proceed with Installing Traefik Enterprise Edition on Kubernetes.
Installation without Direct Access
Only manual installation is available here.
kubectl required instead of traefikeectl
Instead of traefikeectl, usage of kubectl is required to validate cluster initialization and execute commands against TraefikEE cluster like deploying configuration, displaying cluster state. Note that some features are only available using traefikeectl (Ex: backup/restore, uninstall cluster).
Example of command with kubectl instead of traefikeectl: listing components:
Note
Namespace name and cluster name assumed in the examples are traefikee
# Command
kubectl get pod --namespace=traefikee --selector='app=traefikee' --selector='component=control-nodes' --selector='subcomponent=bootstrap'

# Output
NAME                                  READY     STATUS    RESTARTS   AGE
traefikee-bootstrap-7b8f6dfc5b-xfktd 1/1 Running 0 11m# Command
kubectl get pod --namespace=traefikee --selector='app=traefikee' --selector='component=control-nodes' --selector='subcomponent=control-node'
# Output
NAME READY STATUS RESTARTS AGE
traefikee-control-node-0 1/1 Running 1 39m
traefikee-control-node-1 1/1 Running 0 38m
traefikee-control-node-2 1/1 Running 0 38m# Command
kubectl get pod --namespace=traefikee --selector='app=traefikee' --selector='component=data-nodes'
# Output
NAME READY STATUS RESTARTS AGE
traefikee-data-node-7b8f6dfc5b-fzcrn 1/1 Running 0 39m
traefikee-data-node-7b8f6dfc5b-kxmv7 1/1 Running 1 39m
traefikee-data-node-7b8f6dfc5b-snhfl 1/1 Running 1 39m
traefikee-data-node-7b8f6dfc5b-xfvj4 1/1 Running 0 39m
traefikee-data-node-7b8f6dfc5b-xl5bq 1/1 Running 1 39m# Command
kubectl get pod --namespace=traefikee --selector='app=traefikee' --selector='component=control-nodes'
# Output
NAME READY STATUS RESTARTS AGE
traefikee-bootstrap-7b8f6dfc5b-xfktd 1/1 Running 0 21m
traefikee-control-node-0 1/1 Running 0 1m
traefikee-control-node-1 1/1 Running 0 47s
traefikee-control-node-2 1/1 Running 0 38s
# Run this command against either a `bootstrap` or `control-node` pod displayed.
# Command against `traefikee-control-node-0`
kubectl --namespace=traefikee exec --stdin --tty traefikee-control-node-0 -- /traefikee list-nodes
# Output
Name Availability Role Leader
---- ------------ ---- ------
traefikee-control-node-1 ACTIVE CONTROL NODE YES
data-node-traefikee-data-node-68d856488c-5vx5n ACTIVE DATA NODE
data-node-traefikee-data-node-68d856488c-stgns ACTIVE DATA NODE
traefikee-control-node-2 ACTIVE CONTROL NODE
traefikee-control-node-0 ACTIVE CONTROL NODEProceed with one of the following installation guide on Kubernetes:
Imported Kubernetes Cluster
Ensure that kubectl command is using the same Kubernetes configuration as in the
"import cluster" step in Rancher 2 Documentation
(which is different than the kubeconfig from Rancher's UI).
Now proceed to the page Installing Traefik Enterprise Edition on Kubernetes.